Subscribe to our mailing list

* indicates required
News – Page 7 – All Things O'Natural

MY O'NATURAL REGIMEN

By Dominique Harris
on October 01, 2014
With 1 comments

Greetings, greetings,greetings,Beaus and Beauties! I hope all is well with you folks. So, I get asked about my regimen, so I would love to keep you guys abreast to my world of all natural hair. Now, keep in mind, my regimen has worked for me, I try to keep it simple and don't really stray from the method I use nor products (well of course, I use our goodies we make, lol) however, I encourage everyone to seek a regimen that truly works for them. Be inspired,but tweak it so that it works for you. Stay tuned and hang out below.


STEP 1: PRE POO

Pre Pooing is a beneficial step (totally optional) that is done prior to shampooing the hair. It allows the hair to retain more conditioner, helps prevent the hair from swelling (which can aid in dryness) and helps get rid of shed hair that would otherwise find its home in your drain. Oh, and let's not forget, it helps with detangling the hair minimizing breakage. To view my full Pre-Poo Method, click here

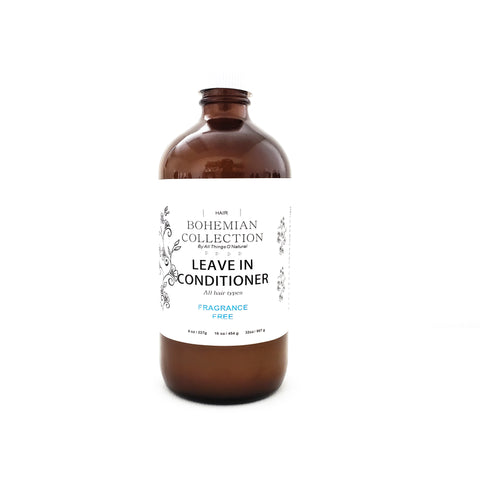
Products of choice for my pre poo: Either our Hair + Scalp Treatment or my Leave In Conditioner. With my hair in 2 to 4 sections, I apply the Oil or Leave In Conditioner  on to dry hair, thoroughly work it in, detangle and cover with a plastic cap for 20-30 minutes, then proceed to shampoo. 


STEP 2: CLEANSE

Products of choice: Nourishing Shampoo. All of these do a wonderful job with clarifying my hair to ensure that product buildup is thoroughly removed, which aids in helping the hair to retain moisture. I cleanse twice per month due to the natural ingredients that I use and I do not accumulate much buildup. I apply the cleanser and focus on massaging into my scalp to ensure a clean scalp and healthy environment for my hair to grow. After cleansing, I soak up excess moisture using an old t-shirt, which causes less friction, frizz and breakage than using a towel. 


STEP 3: DEEP CONDITION

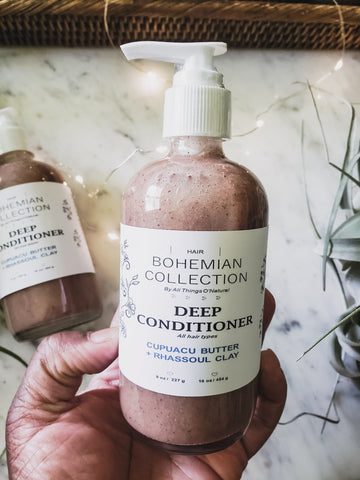
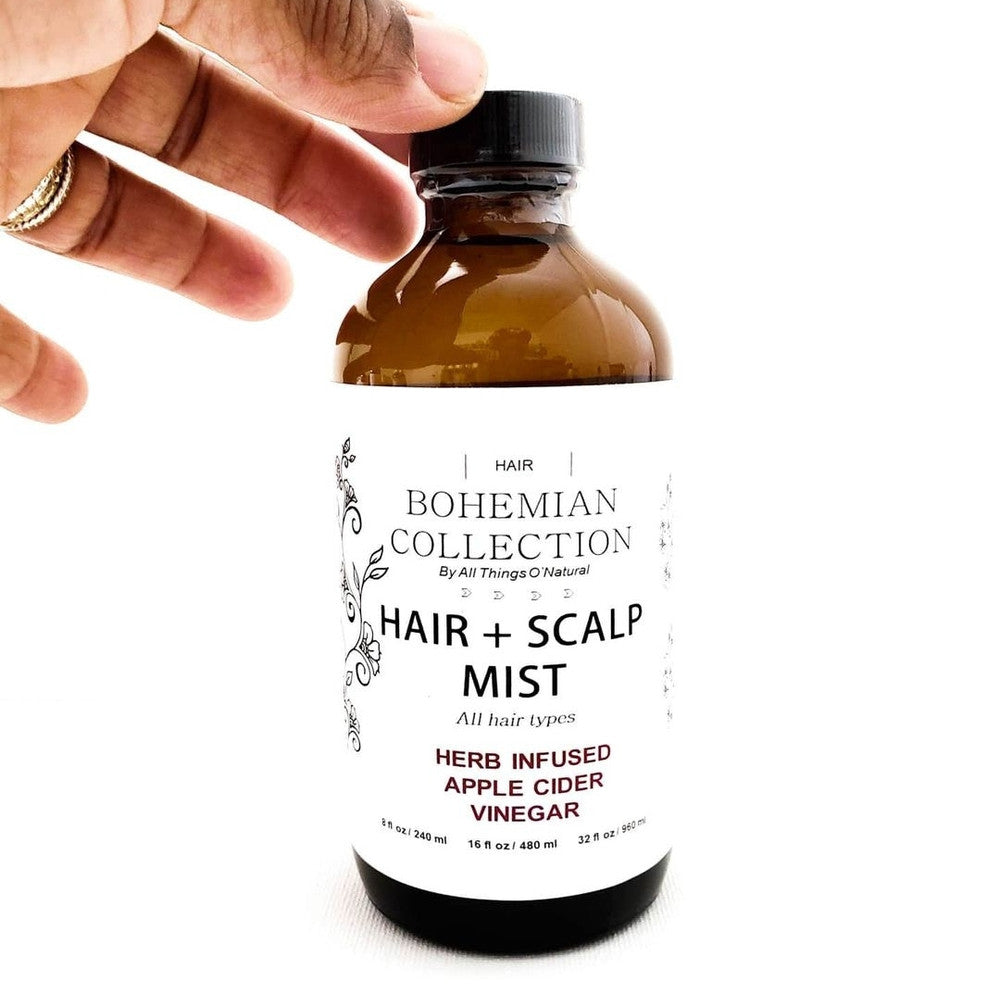
Each time I cleanse, I deep condition using our Deep Conditioner. Talk about a yummy treat for my tresses. I opt to use my steamer or simply heat a desired amount of my conditioner to help lift my cuticles and infuse moisture into my hair,due to my hair's normal to low porosity (For the scoop on Porosity, check it out here). After thoroughly rinsing my deep conditioner out, I spray my ACV Hair & Scalp Mist onto my hair and scalp to help protect my hair and scalp from mineral buildup and environmental contaminants. This also helps to minimize frizz and impart a shine to the hair since it aids with closing the cuticle of the hair, which is lifted during the cleansing and deep conditioning treatments. I wrap my hair in an old T-shirt to allow it to dry to about 50-60%. I've found that when I style my hair on wet hair, it shrinks a ton and the style takes a longer time to dry. Allowing my hair to dry a bit first helps keep my hair a bit more stretched and ensures my hair drys thoroughly. 


STEP 4: MOISTURIZE

Once my hair has dried to about 50-60%, I apply my Leave In Conditioner to my hair as my leave in moisturizer. Throughout the week when  my hair is in need of re-moisturizing, I will use my Leave In Conditioner again to hydrate my hair. If my hair is in a protective style, such as twists or plaits, I will use my ACV Mist to moisturize my hair, as a spray is easier to use when hair is in protective styles. 


STEP 5: SEAL

Anytime I apply a moisturizer or water based product, I make sure to apply my Hair + Body Butter  or my Locs + Tress Oil to seal in the moisture. Because butters and oils are not moisturizers due to the lack of water content, they are known as sealants and are best applied to hair that has been first moisturized or dampened with water or a water based product. Some examples that I use: Leave In ConditionerStyling Creme or ACV Mist (these are all water based products). 


STEP 6: EXTRAS

For extra moisture, after I have applied my Leave In Conditioner, I will apply a dab of my Styling Creme for a greater hold. This helps a ton with definition and I don't need a lot to achieve any style. It's a bit heavier than the Leave In Conditioner so a little goes a long way..and I can opt to apply my Hair + Body Butter for locking in extra moisture or not. When taking down a style, such as twists or plaits for a twist out or braid out look, I always apply a dab of Hair + Body Butter to my hands to help minimize frizz and friction. This also helps to further soften my hair and give it a bit of sheen. This is the only time I will apply my Hair + Body Butter to my hair in a dry state and only a minimal amount is used. 

At night, I protect my hair using my satin bonnet.  Satin is a wonderful fabric for helping the hair to retain moisture...or, I will simply sleep on my satin pillow.


NATURAL HAIR AND POROSITY..THE INSIDE SCOOP

By Dominique Harris
on October 01, 2014
With 6 comments

photo courtesy of CurlyProverbz

Bonjour, Beaus and Beauties! I hope all is great with everyone. I want to chat a bit about a topic that's important, along with so many other topics, yet has been a challenge for many to understand, and that is POROSITY. 

As we embark on our journey to healthy hair, this is a topic that can make healthy hair care a breeze once we understand it and become much more familiar with what it is and why it's important. So, let's dive into it and hopefully this can be of some help as you continue to grow on your quest of all things healthy hair. 


WHAT IS POROSITY


Porosity refers to the condition of the cuticle layer of the hair.  

The 3 types of porosity levels are: LOW, HIGH and NORMAL.


HOW TO TEST YOUR HAIR


Place a freshly washed, product free strand of hair in a cup of water (cool water is fine) and wait for the show. Leave the strand in the water for about 8-10 minutes to see if the strand stays on top or floats to the bottom.


POROSITY LEVELS

  • If the hair quickly sinks to the bottom of the cup, your hair is of  HIGH POROSITY

  • If the hair floats somewhere towards the top or in the middle, you have NORMAL POROSITY.

  • If the hair floats at the top for a long period of time, you have LOW POROSITY hair.


POROSITY..THE INSIDE SCOOP


HIGH POROSITY: 


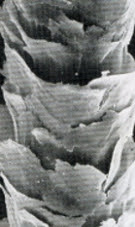
This type of porosity means the cuticle has been exposed to severe amounts of damage, either through environmental exposures, overuse of heat, harsh combing/brushing or chemical processes (relaxers, texturizers, colorants). The strand of hair floats quickly to the bottom of the cup of water due to the weight of the water becoming too heavy to float. Another sign of highly porous hair is that it loses moisture almost as quickly as moisture is applied. A hair, under a microscope, that is highly porous, resembles the gaps of swiss cheese, displaying large holes in the hair follicle. 


CARE THAT HELPS:


For naturals who do have highly porous hair, thick butters and products that contain oils are great because they serve as a protective layer and help to seal the cuticle. Henna and protein treatments are great because they temporarily fill the gaps/holes in highly porous hair. Apple cider vinegar rinses and ACV Sprays formulated with a lower pH because they help to close the cuticle and protect the hair from environmental contaminants . Protein and Deep Conditioning treatments are extremely useful for temporarily patching the gaps of highly porous hair. Keeping in mind that these are temporary solutions, it's best to focus on keeping the new growth healthy,minimizing or abstaining from the use of heat and keeping chemical processes,such as hair colorants, away from the hair simply due to the fact that once the hair is damaged, the damaged hair cannot be 'permanently repaired'. Dry Detangling using an oil or butter to help with the slip and ease of detangling. Finger detangling is also a good option. By using the fingers, it's easier to feel for knots and tangles easier than when using a detangling tool that may pull, tear and snag the knots or tangles. Should you decide to use a detangling tool,as they can be great, first opt for using the fingers to detangle, then proceed to use the detangling tool of choice. With regular trims and being mindful of the information above such as protein treatments and regular deep conditioning, highly porous hair can become much easier to manage. 

NORMAL POROSITY:


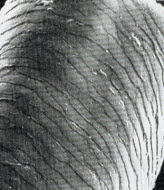
This is the happy medium. It means that the hair allows for easy moisture inside the cuticle and it holds moisture for long periods of time making hair less susceptible to breakage. It's a very desirable and low maintenance type of porosity. Be aware, regular chemical processes and excessive heat use can change the hair's porosity over time. Healthy ingredients, regular deep conditions, moisturizing and little to no heat will help keep normal porosity hair at it's best.


LOW POROSITY:


This type of porosity is not as bad as it may seem. This type means that the cuticles are tight and pretty resistant to opening up for moisture. With hair that is of low porosity, many times it may feel as though product is sitting on top of the hair instead of thoroughly penetrating through the hair. The benefit of having low porosity hair is that once moisture is able to penetrate the cuticle, it holds on to it very well...the key is just getting the moisture inside. 


CARE THAT HELPS:

With low porosity hair, it's best to incorporate ingredients, especially when cleansing, of a higher alkalinity pH. Some tips that can help to infuse moisture into hair that is of low porosity is by incorporating heat or steam when deep conditioning, such as the use of a steamer, heat cap or simply heating the desired amount of deep conditioner and applying to clean damp hair. Be sure when moisturizing the hair, dampen the hair with a water based moisturizer, such as a leave-in conditioner, then apply a butter or oil to lock/seal in the moisture to help train the hair to hold onto moisture longer.


My Hair:


My hair is a great mix of normal and low porosity. Feel free to check out my older regimen here to see how I have managed to achieve and maintain healthy moisturized hair. Education, trial and error has truly helped me to understand and care for my hair and with that, I hope to help others throughout their journey by sharing my experiences. As always, I hope this helps, feel free to share your hair's porosity and how you care for your hair.

HEALTHY HAIR GROWTH...RETAINING LENGTH

By Dominique Harris
on September 22, 2014
With 3 comments

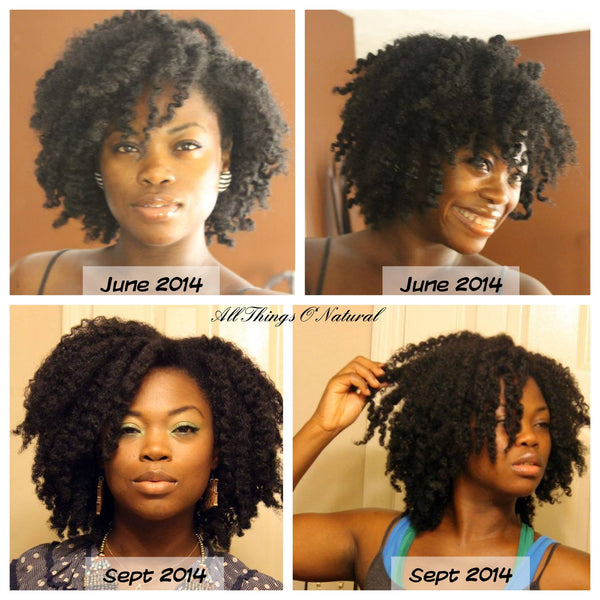
(For this pic..I cut 3 inches of my hair in June for a fresh summer look and this has been my growth thus far, including trimming)

Greetings, everyone!!

I thought I would drop in and give the scoop on the question I receive quite often, which is 'How do you get your hair to grow so quickly?' Well, I can tell ya one thing..I don't take vitamins, I don't apply any miracle serum nor trendy promises of 'grow quick solution products' and my own products do not contain magical ingredients that would cause my hair to grow any quicker than what it is naturally intended to grow given that I give it a healthy environment to grow in.
So without further ado, Let's recap HEALTHY GROWTH and RETAINING LENGTH.. Now, keep in mind,  hair grows at a rate of about 1/4 - 1/2 INCH per month. The rate of our hair growth is determined by a few things, a few are: Genetics, Diet, Exercise and how we treat our hair overall. If we give our hair a nice platform/environment to grow, it will grow.  Here's some tips that ensure healthy hair growth, which is the main importance..HEALTHY


 HEALTHY HAIR TIPS: 


KEEP THE SCALP CLEAN .

Applying large amounts of oils and butters only clog the pores on our scalp. Our scalp produces natural oils and many times it has an over production or does not produce as much due to a few things. (a) Years of being clogged using clog poring ingredients (silicones, mineral oil, petroleum, oils, butters). (b) lack of water intake..It's very important that we drink plenty of water (c) Improper diet. Certain foods can have allergic reactions in our bodies and many times,we do not know it unless we keep a journal of foods that cause us to have reactions on our scalp, you will normally see scalp issues such as dermatitis, psoriasis, etc (dairy is known to be a major culprit, but not the only culprit)...Ok, so back on track, be sure to keep the scalp clean and healthy. Making sure to thoroughly cleanse at least once per month using a clarifying cleanser and herbal, tea or acv rinses and co-washing..So again, keep the scalp clean, it's a living breathing organ and is easily clogged which causes it to malfunction

 PROPER DIET AND WATER INTAKE IS IMPORTANT:

Again. Proper diet(clean healthy eating), Exercise and good water intake. Exercise is an excellent way to get blood circulation flowing which encourages healthy hair growth. For some helpful healthy eats info, check out our challenge we have going on now here

 MOISTURE.

Be sure to keep the hair moisturized properly. A wonderful way that has ensured that my tresses stay moisturized is..First, apply water or a water based product to the hair...Then, apply a butter or oil to lock/seal in the moisture. Be sure when detangling the hair, use products that give a good amount of slip (makes it easy for tangles to glide apart). Also, I've found finger detangling helps retain more length than using a brush or other detangling tool.

 TRIMMING/DUSTING:

Trim hair when needed. Because our ends can make or break our hair, it is of the utmost importance to keep them hydrated and trimmed when needed. For more information on achieving and maintaining healthy ends, check out my post here


HIH (HAND IN HAIR SYNDROME)

Try at all possible to keep hands out of hair. I know we love love love our natural and want to rub on it, or our significant other loves to rub on it, but this can cause friction which leads to breakage. If it helps, keep hair in protective styles such as twists or braids/plaits, buns (not too often) so it's less tempting to caress our tresses.

PRODUCTS JUNKY-ISM.

Try, if possible, to remain faithful to a few products..When we indulge in many products, we have a harder time to know what may or may not create an issue with our hair. Giving a product time to work is one of the best ways to know if a product is truly working for your hair. What I have found for myself and other naturals who have achieved healthy hair and awesome growth is that we are faithful to the products we use and usually don't succumb to product junkyism..as tempting as it is. Secure a regimen that works for you and work those products that work for you.

NIGHT PROTECTION.

Protect your hair at night with a satin scarf, bonnet or satin pillowcase, whichever works best for you

DOCUMENTING YOUR JOURNEY..

Pictures are an awesome way to see your growth, if that is your goal. Because we see ourselves daily, it's hard to see our growth. On those days, weeks, months that I wasn't sure my hair was growing, I would look back on pics and see the growth. Those of us who have FB pages, we love for you to post your pics to our page..then revisit those pages a month or two later and look at those pics again.


 USE HEAT SPARINGLY OR NOT AT ALL.

The use of heat can create a host of issues on the hair. So if at all possible, use as sparingly as possible and should you choose to use heat, be sure to use on clean hair and apply a heat protectant each time. For the scoop on how I used heat on my tresses, check out my post here

PATIENCE..

No matter how many products promise this, that or the third, hair grows at the rate that it is naturally designed to grow..Have patience, love it, nourish it and take care of it and it will grow..but more importantly it will grow healthy!!


If you love it..It will Grow..Healthy!! 

REFRESHING THE LITTLE ONE'S HAIR

By Dominique Harris
on September 11, 2014
With 0 comments

Greetings, Everyone!! I pray all is well with you. 
Ah, the daunting task of grooming our little ones!! Actually, I have found the task, not so daunting. What works for me is the 'keep it simple' rule. I keep products simple and grooming time simple..I just do not have the time on my hands to take loads of time doing hair. I do get the question, 'do I use different products on our little ones than I do for myself?' The answer..no..Not only do I use the exact same products, my husband and other 3 children use the same products..again, we live by the 'keep it simple rule'. So, here is my step by step on remoisturizing and refreshing my little one's hair in 3 Steps. As always, I hope this helps.

STEP 1: MOISTURIZE 

 
This is an extremely important step in ensuring the health of hair. I begin by placing her hair into 4 sections. Working one section at a time, I spray our Natty ACV Hair & Scalp Mist onto her hair until damp. Work the moisture in thoroughly making sure to cost each strand. Gently finger detangle. Using the mist is the quickest way for me to hydrate and detangle her hair. It also helps to keep her hair and scalp ph balanced as well as protect the scalp from dirt, debris, fungi and other contaminants due to the ingredients. 
 

Step 2: SEAL. 

Once her hair is hydrated, I apply our Natty Butter to lock in the moisture and give her hair a nice sheen. I rub the butter into my hands to melt instantly, then apply to her hair. I make sure to hydrate and seal her ends and edges. I apply a heavier amount of butter to her ends to keep them healthy. Always keep in mind..Butters, Oils and pomades are known as 'SEALANTS'. Due to the fact that they do not contain moisturizing properties of water, they do not act as moisturizers. Applying the items to un-moisturized hair will give you greasy, not moisturized hair, which leads to further dryness. Moisturize FIRST, then apply your butter, oil or pomade to SEAL in the moisture SECOND.
 

Step 3: STYLE. 

 
I normally place her hair in plaits then bun it up to keep her ends protected. I never make the plaits too tight or place extreme tension on her hair, which can lead to breakage and thinning. I usually don't have to remoisturize for 3-4 days sometimes longer... Of course, each child is different, so please take note of how often you may need to remoisturize your child's hair. 
 
Key Notes: In terms of dryness, just like with our own hair, there are many factors that can aid in dryness, such as: improper diet, lack of water intake, stress, harsh ingredients in products, harsh combing and brushing, product buildup, dead ends, not properly moisturizing (see Step 2 again). Be sure to see what products and techniques may be the cause of your little one's hair issues then take action. Hope this helps.
 

Naomi's Refreshed Hair


TEAM ATON'S 30/30/30 CHALLENGE: DAY 1-30

By Dominique Harris
on September 08, 2014
With 1 comments

DAY 1:

INFORMATION BLASTS

MENU PLANNING:

Here's a helpful tip for planning meals. I created this helpful menu to help lessen the stress of thinking of what to prepare for meals during the week. This helps with grocery shopping and needed preparation. It helps us shop with a purpose, focusing on items necessary to balance a healthy lifestyle. Hope this helps

FOOD EXAMPLES


BREAKFAST

Good morning, Team ATON!!
Here is an amazing raw and live food smoothie recipe from @simplegreensmoothies (one of the websites I listed at the introduction of the challenge). She used a plethora of raw foods and added flaxseed (live food) to top it off. This is a great 'breakfast or lunch idea' to incorporate raw and live foods into a meal. Here is the recipe for this gorgeous Red Green Smoothie:

RASPBERRY COCONUT SHORTCAKE green smoothie | serves two
2 cups spinach
1 cup coconut milk
1 cup coconut water (if possible, use the fresh coconut water straight from the coconut. Just take a fresh coconut, using a nail and hammer, hammer one to 3 holes and drain the fresh water and add to your smoothie)
3 cups raspberries
1 Tablespoon ground flax seed
1 teaspoon vanilla extract
OPTIONAL: garnish with coconut flakes, flax seed

SNACK IDEAS:

Here's a raw snack idea that I love:
*Handful of Almonds (raw)
*Water (room temp) with raw lemon juice (raw) I also add some fresh herb such as mint (raw) to my lemon water. Great for energy and keeping bad breath at bay.
*Bowl of berries (raw), add some fresh coconut shaving for extra nutritional benefits
Snacks are great for keeping energy and metabolism up as well as preventing the urge to over eat during meals.

LUNCH IDEA:

Ahh, the beauty of a wrap! I love wraps. You can place so many awesome ingredients inside of them. Here, I used humus, tomato, bell pepper, fire roasted tomatoes, cucumber, green onion, spinach and wrapped inside of a tasty shell. I added a raw salad blend on the side and shaved some fresh almonds on top. Just enough for a lively lunch. Raw foods give the body needed energy, enzymes, nutrients and vitamin..basically, LIFE essentials. Try not to over-think your meals, for the challenge, just be sure to incorporate some raw goodness into the mix, this can be via a smoothie, nuts, berries, fruit, salads, spring rolls, sprouts. If you would like to view the details of how I made this wrap, feel free to check it out here: HUMUS WRAP

30 MINUTE WORK OUTS

Don't forget, take your pics today and keep them in a journal of file on your computer. Take more pics throughout the challenge to track your progress.

Part of our challenge is at least 30 minutes of exercise. This could be a walk, jog, aerobics, swimming, etc.
for me, I try to focus on at least 30 minutes of cardio (usually my spin bike or kick boxing) then 10 minutes of kettle bell or core training then abs. I look at my target area and see what I want to improve, such as my obliques, tighten my thighs more and strengthen my upper body and work it out. I don't normally weigh myself as I don't believe in scales because they don't give accurate info based on muscle vs fat. The last weigh in: I am 5'6, 168 lbs, 24% bmi (body mass index)...if I were to go by a standard weight scale, I would be labeled overweight based on my height and weight. Thanks to my homeopathic doc explaining how that system can be skewed and to not put so much emphasis on it...So, I focus on toning areas that may have more fat than others and core training. Diet, more than anything, play a HUGE role. I don't believe in DIETING, but I do believe in eating healthy foods overall. It's all about balance! Lets do it!!!

TEAM ATON'S 30/30/30 CHALLENGE

By Dominique Harris
on September 07, 2014
With 1 comments

WHO'S READY FOR A CHALLENGE!!!!

Ok, guys, I know it's been awhile since we've embarked on a challenge..not since our 'Oil Pulling Challenge', and yes, it's time!! And of course, this page is about opening our minds to a healthier mind, body and spirit..
When meditating on this challenge, I had to think that with the plethora of health ailments consuming many lives today, how could we embark on a challenge to help people open their minds and lives to incorporating healthy practices into their lifestyles. You know my motto, 'any start is better than no start'...And the problem many express is that they simply do not know how to begin or the direction to take to begin a healthier lifestyle..OR, many may not have the support at home when embarking on a healthier lifestyle....Well, inspiration and motivation challenges are a great way to help. Unfortunately, it's simply not so easy to just 'be vegan' or 'eat healthy', especially if you truly do not have the knowledge of where to begin, or breaking habits that have been lifelong. What I don't expect is for everyone to become pescatarian, vegetarian, vegan or any of the sort. Yes, those are excellent lifestyles, but everyone may not be ready for that or even want that, so I believe in meeting people where you are and starting from there. It's all about the start..so, for the next 30 days, I want to propose a challenge to have a Healthy body takeover. As Hipoccrates stated. 'Let Food Be Thy Medicine and Medicine Thy Food'...True health care reform begins in the kitchen, from great ingredients from the earth. Who's Ready....Let's Do This!!
Be sure to tune in to get helpful health tips throughout the challenge. 
Websites to follow:

HOW I TRIM MY NATURAL HAIR

By Dominique Harris
on September 06, 2014
With 2 comments

One thing I have learned while returning to my O'Natural self is making sure to maintain healthy ends. That, of course, entails keeping them moisturized and keeping them trimmed. Since I recently gave myself a nice cut, I have noticed much fuller healthier hair. Of course, the information below is for those who feel comfortable trimming their own ends..if not, I highly recommend visiting a stylist who is educated and qualified to work with highly textured natural hair. So, here is my step by step on how I trim my natural hair. I have been using this method for over 2 years and I keep it pretty consistent. 
STEP BY STEP PICTORIAL

Trimming Natural Hair. Very important throughout your journey and each person will vary for how often they choose to trim. For me, I now do small 1/4 mini trims every 2 months it keeps my tresses even more healthy, full and thriving.  Because our ends are the oldest part of the hair, it's the most fragile and like anything else, they do have a shelf life. Once ends need to be trimmed, no amount of product or maintenance will help..so to keep hair in optimum form, dust those ends. And as always, I Hope this step by step of how I trim helps.

STEP 1

 To soften hair, apply your favorite natural conditioner (I used my Natty Moist conditioner). Be sure to apply to edges and nape of the neck which are often neglected.

STEP 2:

To help with the process, place conditioned hair into sections. I either do 2 or 4 sections. Place a plastic cap onto hair for 30 minutes to allow the conditioner to soften and hydrate the hair.

STEP 3:

After allowing hair to condition. Remove plastic cap and prep for trimming. Starting with one section at a time, grab about an inch or more of hair, making sure to grab sections that are similar in length. Grabbing sections where the hair is uneven such as when you have layers may cause you to cut more hair than intended due to the length difference. Smaller sections makes it easier to work with and trim.

STEP 4:

Always keep the hair moist which makes it more pliable when manipulating the hair. Choose your favorite moisturizing mist or plain ole water and moisten the hair.

STEP 5:

Apply your favorite natural conditioner to the sectioned hair and be sure to thoroughly coat and work the conditioner through. Finger detangle to remove any knots. Again, the moisture helps with the process.

STEP 6:

Take your detangling tool of choice. I use my Denman detangling brush  Beginning with your ends, begin gently detangling your hair working your way up to the roots. Always begin detangling at the ends
while holding your hair with your free hand to minimize snags and pulling. (I don't use detangling tools often, so this is one of the rare times I will use a tool, such as a brush to detangle. I normally finger detangle)

STEP 7:

Once the hair is nicely moisturized and detangled, place your free hand right above the desired amount of hair to trim. Trim the desired amount of hair. I normally trim about 1/4 to 1/2 inch of hair.

STEP 8:

Once that section is done, I twist (you can braid or simply pin out of the way) and repeat the process until my entire head has been moisturized, detangled and trimmed

STEP 9:

Once my entire head is moisturized, detangled, trimmed and twisted, I hop in the shower and allow the water to rinse the conditioner out, giving me a light co-wash. The beauty is that my hair is already sectioned, pre detangled and twisted. Once out of the shower, I will simply spray my hair with my Natty ACV Hair and Scalp Mist to help close the cuticles (aids in imparting shine, minimizing frizz, protecting the hair and scalp from mineral deposits) then apply my Natty Butter to lock/seal in moisture and voila..

Enjoy your beautiful Natural!!


MY NATTY TWIST OUT

By Dominique Harris
on August 28, 2014
With 2 comments


(Pic shows how the light reflected off of my twist out)

Greetings everyone!! Now I know everyone has their method of how they rock their twist out, but I wanted to share my step by step of how I achieve my twist out. As always, I hope this helps.


STEP 1:


I use 1 or sometimes 2 products: a moisturizer (either my Natty Creme (Styling Creme) alone or my Natty Moist) (Leave In Conditioner) and a sealant to LOCK in the moisture (my Hair + Body Butter ( Natty Butter).


STEP 2:

On slightly damp hair..or on dry hair, place hair in sections to make the process easier. NOTE: if I am twisting on freshly washed hair, I place an old tshirt on my hair to absorb the excess water until my hair is about 75-80% dry. This ensures my twists will be thoroughly dry when I untwist. Using an old tshirt minimizes frizz and friction that comes when using bath towels. 


STEP 3:

Take a small, medium or large section of hair (depending on the size you want your twists to be) and apply a generous amount of your moisturizer. Then apply your sealant of choice to lock in the moisture. I prefer natural butters or natural pomades to help the hair not only lock in moisture but also clump the hair together to create a smooth twist and twist out. 


STEP 4:

While not using a ton of the product, I always make sure my hair is thoroughly moisturized so you may see some of the moisturizer on my twists as I'm twisting, which my hair will nicely absorb ensuring moisturized hair. I twist very tightly to create a sort of memory foam effect so when I untwist the curls are super defined and last for quite awhile.  I make sure to MOISTURIZE my ends and edges especially to ensure they are healthy. I use the same moisture and seal technique on my ends and edges, that I use for my twists. 


STEP 5:

Once my twists are completely dry, I apply a little Natty Butter to my hands then proceed to unravel my twists. Applying the butter or pomade helps to minimize frizz and give hair a nice sheen. Be sure to use a wooden or plastic pick to fluff the hair at the roots (only) for added volume and a fuller look.


STEP 6:

Rock it out and Enjoy!


Key notes: I don't use a ton of products for any style. Understanding moisture is the key and making sure to seal/lock in the moisture with a butter, oil or pomade. 


My Results:


At night,

I simply pull my hair into a low bun and cover with a silk or satin scarf. This helps stretch the hair and keeps the hair less frizzy. You can also opt to do a pineapple. Where you gather all of your hair into a very high loose ponytail and then cover with a scarf.  


PROTECTING YOUR ENDS FOR HEALTHIER HAIR

By Dominique Harris
on August 28, 2014
With 2 comments

How are you protecting your tresses at night?

I Moisturize my ends more than I do the rest of my hair. The ends are the oldest part of the hair and can be the driest which can wreak havoc on the rest of your hair. To hydrate my ends, I mist with my Natty ACV Mist or apply my Natty Moist or Natty Creme to my ends to moisturize, I then apply my Natty Butter to lock in the moisture. Doing this has helped tremendously with keeping my ends and hair healthy. I then cover with my favorite charmeuse satin bonnet by Eboni Curls .
So..How do you protect your hair at night?
Feel free to share tips on how you protect your hair at night.
#healthyhair #ebonnets #ebonicurls #charmeusesatin#moisturize #hairlove

PROTEIN IT UP..NATURALLY

By Dominique Harris
on August 27, 2014
With 0 comments

Kettle Bell workout and Protein Smoothie.
This is definitely one of my husband's favorite smoothies. Packed with protein and other wonderful goodness. It has a wonderful chocolate nutty flavor. When our bodies are hungry, most times its craving protein and this is an excellent source of protein.

So, here's the scoop:

1 cup of Almond Milk

3 ripe bananas (the ones with the most benefit are the ones that have the brown on the outer peel)

1 cup of pure almonds or 3 tbsp of almond butter. (Peanut butter is an acidic food, almond butter is an alkalinic food. Alkaline foods are better for the body)

3 tbsp of Raw Cacao Powder (for the benefits of raw cacao see my blog post here 

3 dates to sweeten

Blend.

I used our #Vitamix blender because its powerful enough to blend almonds and does a wonderful job of blending everything together. And this mixture makes a wonderful frozen treat, so enjoy. Oh, and kids love it too!!!

Cart Summary

Your cart is empty

Recommended products

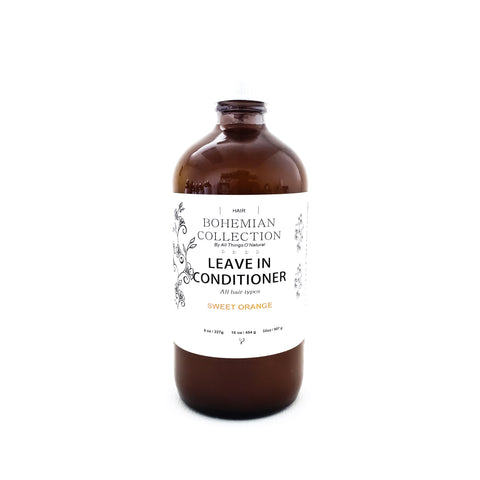
  • LEAVE IN CONDITIONER
    LEAVE IN CONDITIONER LEAVE IN CONDITIONER
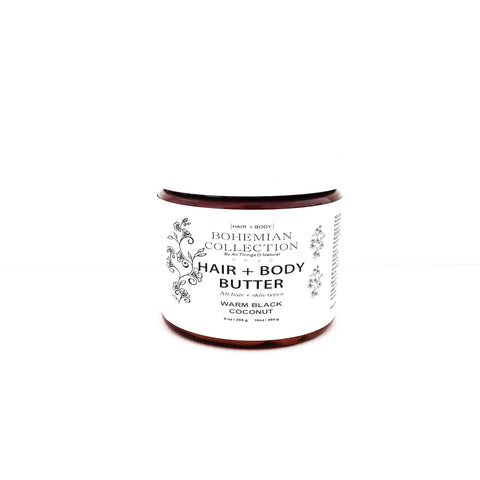
  • HAIR + BODY BUTTER
    HAIR + BODY BUTTER HAIR + BODY BUTTER
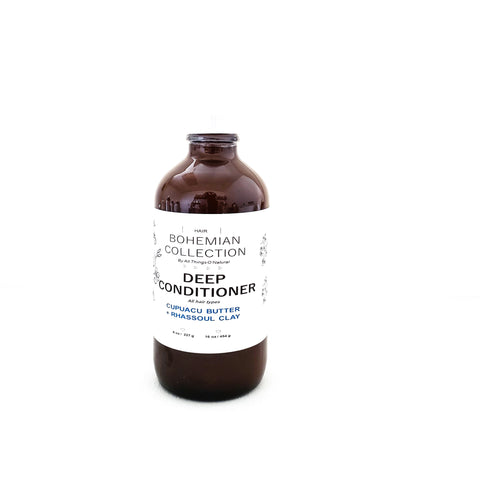
  • CUPUACU & RHASSOUL DEEP CONDITIONER
    CUPUACU & RHASSOUL DEEP CONDITIONER CUPUACU & RHASSOUL DEEP CONDITIONER

From the Blog

The Holiday Gift Guide

November 24, 2024

Happy Holidays! As we are preparing for the upcoming holidays, we thought it would be the perfect time to help...

Read more →

Our New STYLING GEL

July 11, 2024

Welcoming our newest addition to our hair care line, our Styling Gel is loaded with beneficial nutrients that help retain...

Read more →

 
Liquid error (snippets/sweettooth-widgets line 2): Could not find asset snippets/sweettooth-tab-widget.liquid